If you have a lot of programs open at one time, it might be helpful if you can split them up among multiple workspaces. Ubuntu allows you to move open programs to different workspaces. Workspaces are like virtual screens you can switch among. The same desktop, panels, and menus display in every workspace.
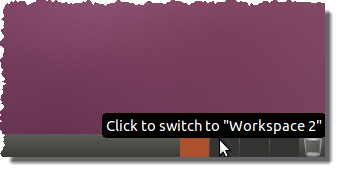
However, each workspace can have different applications running inside it, and those applications keep running when you switch to a different workspace. This tool that allows you to have multiple workspaces is called the Workspace Switcher, and is found in the lower, right corner of your screen on the bottom panel next to the Trash icon, by default.
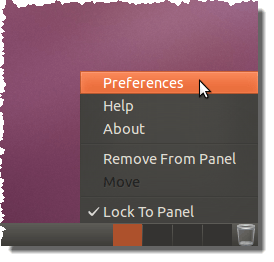
There are several settings you can customize for the Workspace Switcher. To access these settings, right-click on the Workspace Switcher and select Preferences from the popup menu.
The Workspace Switcher Preferences dialog box displays.
The first set of options determines how the workspaces are displayed on the switcher. If you select the Show only the current workspace option, you must use the keyboard shortcuts to switch among workspaces. To switch to the workspace to the right of the current workspace, press Ctrl + Alt + right arrow.
To switch to the workspace to the left of the current workspace, press Ctrl + Alt + left arrow. These arrow keyboard shortcut keys work according to the layout of your workspaces on the panel. If you have your workspaces displayed vertically instead of horizontally, use Ctrl + Alt + up arrow and Ctrl + Alt + down arrow to switch among the workspaces.

You can change the layout of the workspaces on the panel by selecting the Show all workspaces in X rows option and specifying the Number of workspaces. For example, if you want to display 4 workspaces vertically on the panel, enter 4 for the Number of workspaces and enter 4 as the value for X in the Show all workspaces in X rows edit box.

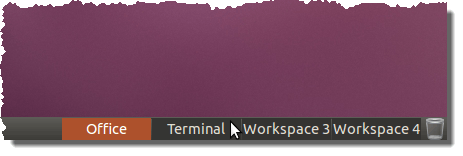
You can also change the name of each workspace. For example, you might have all office programs in one workspace. You can rename that workspace to Office. You could use another workspace for all your work in a Terminal window, and call that workspace Terminal. Simply click on a Workspace name in the list twice slowly, until the name is highlighted. Type the desired name and press Enter.
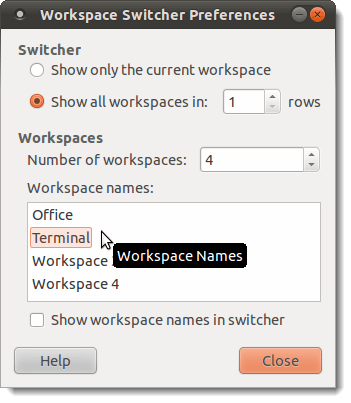
If you want to display the name of each workspace on the Workspace Switcher, select the Show workspace names in switcher check box.
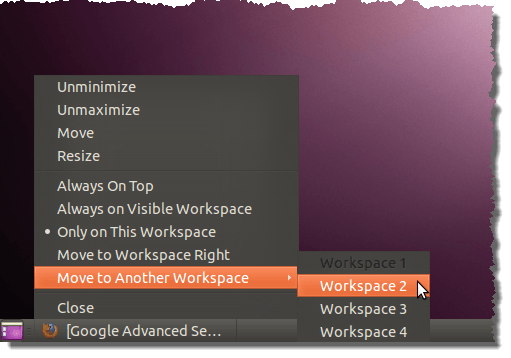
To move a minimized program to another workspace, right-click on the program’s icon or button on the panel and select Move to Another Workspace from the popup menu. A submenu displays, listing all available workspaces. The currently displays workspace is grayed out. Select a workspace name from the submenu to move the program to that workspace.
NOTE: If the program is open and not minimized, right-click on the title bar of the program to access the Move to Another Workspace option.
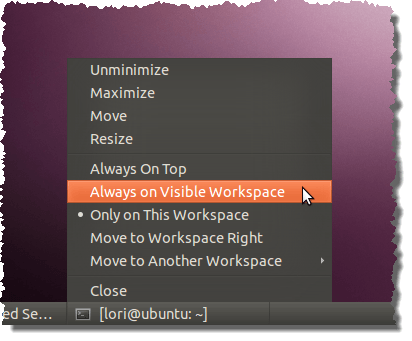
If you have a program open that you want displayed all the time, no matter which workspace is being displayed, right-click on the program’s icon on the panel, or on the title bar of the program, and select Always on Visible Workspace from the popup menu. For example, you may want a Terminal window available on all workspaces, if you use it often.
You can use the Workspace Switcher to categorize your open applications. For example, use one workspace for internet related programs, such as web browsers and email programs. Use another workspace for office programs, such as OpenOffice. Managing your open programs using workspaces can keep you organized and more productive.

No comments:
Post a Comment