There may be various reasons why you might want to run multiple Firefox profiles at one time. You may want to test extensions without affecting your current setup, create a minimal profile for checking email, or you may just want to use a clean profile sometimes.
There is a way you can run multiple instances of Firefox, each running a separate profile using specially-created Firefox shortcuts. We will show you how to create special shortcuts in Windows 7 and special launchers in Ubuntu 10.10. The procedures for each operating system should work the same way in earlier versions of the same operating system.
First, you need to create a new profile, if you only have one. Our previous post, Speed Up the Start Time for Firefox by Creating a New Profile, shows you how to create a new profile, so we won’t cover that again here. However, we will show you how to open the Firefox Profile Manager in Ubuntu. Once open, the Profile Manager operates the same way in both Windows and Linux.
IMPORTANT: In the post mentioned above, you are told to turn off the Don’t ask at startup check box on the Profile Manager. To run multiple Firefox profiles at once, make sure that check box is turned on (has a check mark in it).
To access the Firefox Profile Manager in Ubuntu, press Alt + F2. Enter the following command in the edit box and click Run.
/usr/bin/firefox -P
NOTE: The icon automatically sets to the Firefox icon once you type the full path to the Firefox executable file.

Once the Profile Manager is open, you can follow the steps in the post mentioned above to create a new profile in Ubuntu. The steps for creating a new profile in Ubuntu are the same as they are for creating a profile in Windows.
The next step is to create another Firefox shortcut for each profile you want to open. First, we will create shortcuts in Windows 7.
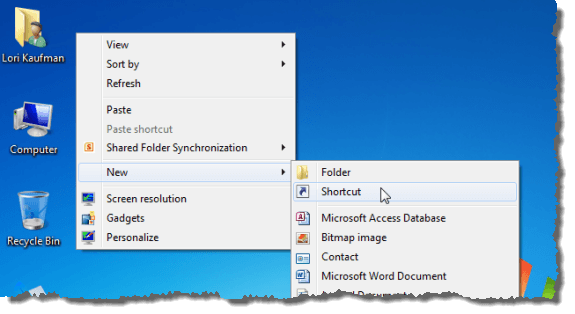
Right-click on an empty area of the desktop and select New | Shortcut from the popup menu.
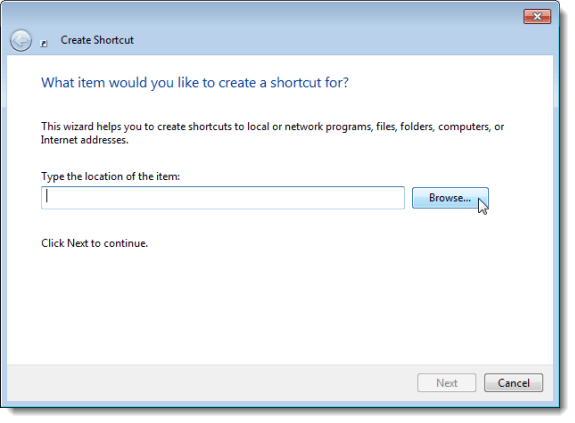
The Create Shortcut dialog box displays. Click the Browse button to select the location of the Firefox executable file for the shortcut.
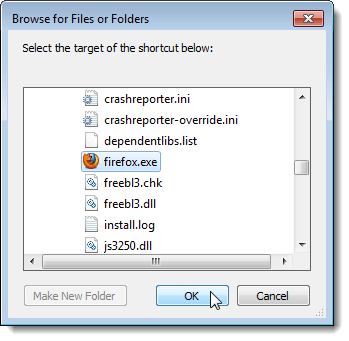
On the Browse for Files or Folders dialog box, navigate to the location of the Firefox executable file (generally found at C:\Program Files\Mozilla Firefox) and select the firefox.exe file. Click OK.
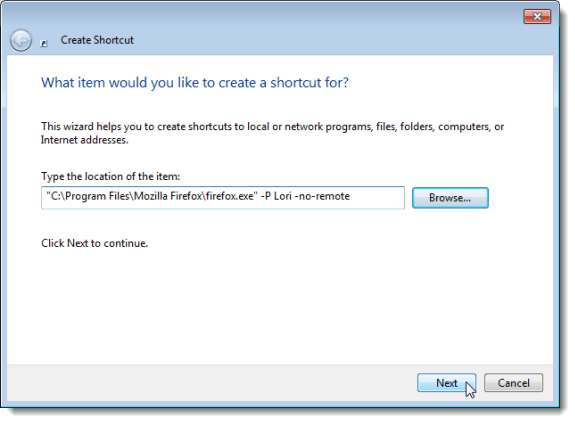
You are returned to the Create Shortcut dialog box. The full path to the Firefox executable file is inserted in the Type the location of the item edit box. Put the cursor at the end of that path, and type a space followed by the following text.
-P {Profile Name} -no-remote
Replace {Profile Name} with the name of one of your Firefox profiles.
NOTE: All the dashes are single dashes and there is one space on each side of the {Profile Name}.
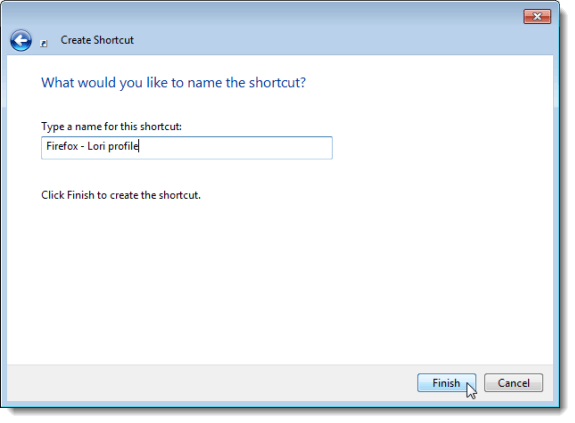
Click Next.
Enter a descriptive name for the shortcut in the Type a name for this shortcut edit box and click Finish.
The new shortcut is added to the desktop. Follow the same steps above to create other shortcuts for other profiles you have created in Firefox.
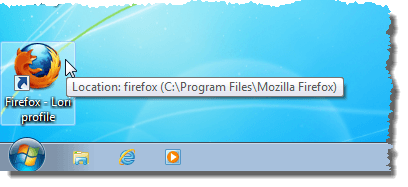
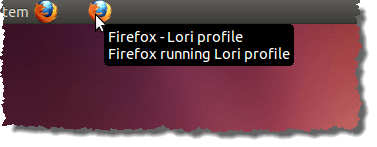
NOTE: When you have multiple Firefox windows open in Windows 7 with different profiles, the icons on the Taskbar look the same. If you have a different web page open on the active tab in each Firefox window, you can tell the windows apart by moving your mouse over the Firefox icons on the Taskbar. The name of the currently open web page displays.
![]()
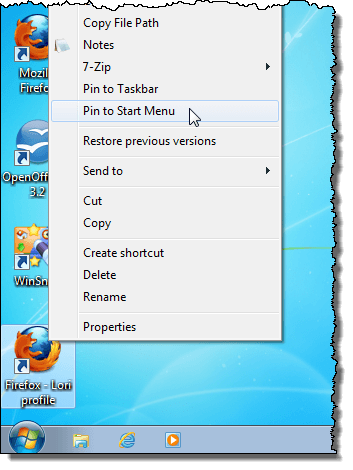
If you want your shortcut available on the Start menu or the Taskbar, right-click the shortcut and select Pin to Start Menu or Pin to Taskbar, respectively, from the popup menu.
Now, we will create Firefox launchers in Ubuntu. You can add launchers to the desktop, the panels, and the menu in Ubuntu.
To add a launcher to the desktop, right-click on the Ubuntu desktop and select Create Launcher from the popup menu.
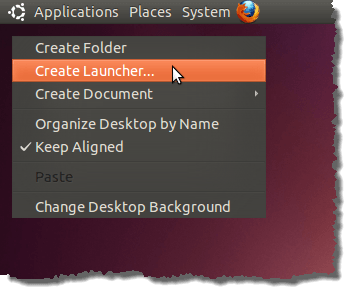
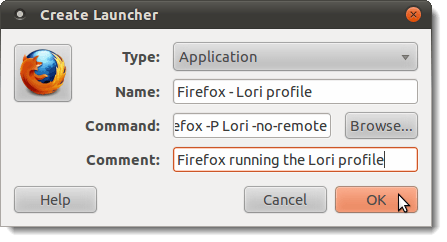
The Create Launcher dialog box displays. Enter a name for the launcher in the Name edit box. Type the following command in the Command edit box.
/usr/bin/firefox -P Lori -no-remote
NOTES: The dashes and spaces in the command are the same as they are for Windows. Also, once you type “/usr/bin/firefox”, the icon automatically changes to the Firefox icon.
Enter a comment for the launcher in the Comment edit box. Click OK.
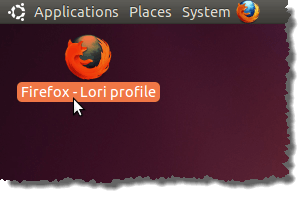
The new launcher is added to the desktop. Follow the same steps above to add launchers for other Firefox profiles you have created.
You can also add launchers to different Firefox profiles to a panel if desired. To do this, right-click on a panel and select Add to Panel from the popup menu.
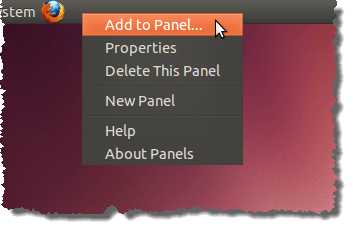
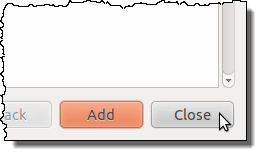
The Add to Panel dialog box displays. Select Custom Application Launcher and click Add.
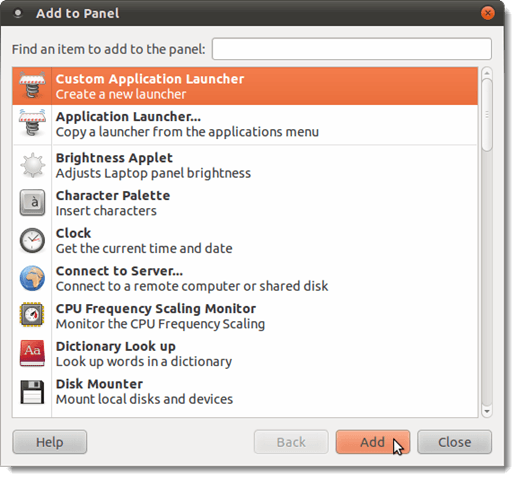
Fill out the information on the Create Launcher dialog box the same way you did when creating a desktop launcher. Click OK.

If you want to add more launchers to the panel for different Firefox profiles, leave the Add to Panel dialog box open, and select Custom Application Launcher and then click Add for each launcher you want to create. Fill out the Create Launcher dialog box using the appropriate Firefox profile name in the Command and entering a descriptive Name and Comment.
When you are finished creating the desired launchers, click Close to the close the Add to Panel dialog box.
Here’s an example of a Firefox launcher on the top panel for a specific profile.
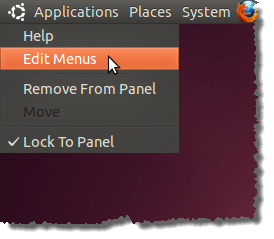
To add a launcher to the Applications menu, right-click on the menu bar and select Edit Menus from the popup menu.
The Main Menu dialog box displays. Select the Internet submenu under the Applications menu in the list on the left. Click the New Item button. The Create Launcher dialog box displays again, just like when you added a launcher to the desktop and one to the panel. Fill it out as before.
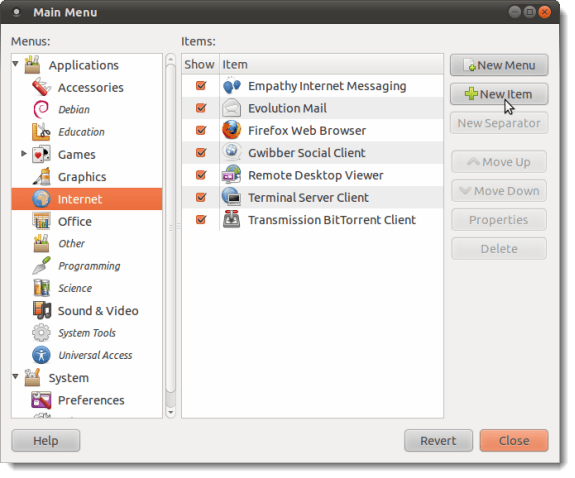
The launcher is added to the list of items on the Internet menu. If you want to move it from the default location, select the item and use the Move Up and Move Down buttons. Use the New Item button for every launcher you want to add to the menu. When you are finished adding your launchers to the menu, click Close on the Main Menu dialog box to close it.
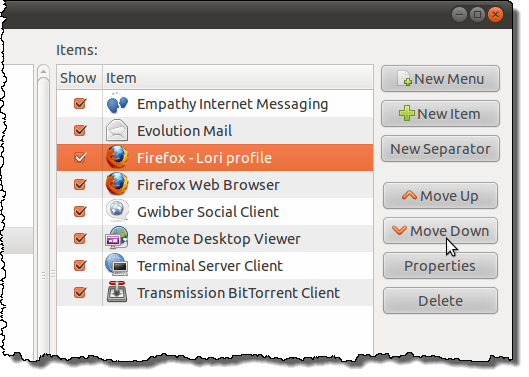
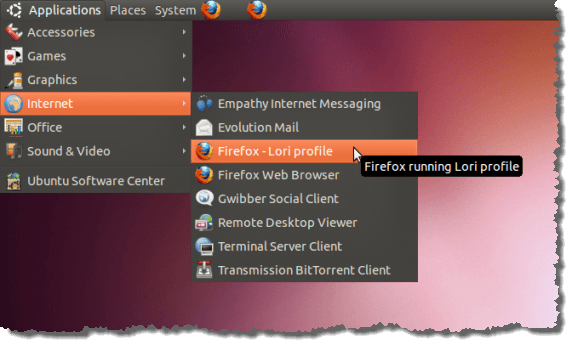
Any launchers you created are added to the Internet menu on the Applications menu.
Using multiple profiles can help you organize your work, performing certain categories of tasks in each profile. This is similar to using multiple desktops in Windows and Ubuntu (see our posts, Organize the Windows Desktop Using a Virtual Desktop Manager – Part I, Organize the Windows Desktop Using a Virtual Desktop Manager – Part II, and Use Multiple Workspaces in Ubuntu).
In fact, you can have a different profile to match the purpose of each virtual desktop you set up in Windows and the same for each workspace you set up in Ubuntu.

No comments:
Post a Comment